Leave Your Message

How to Choose the Best Heating Cables for Your Project

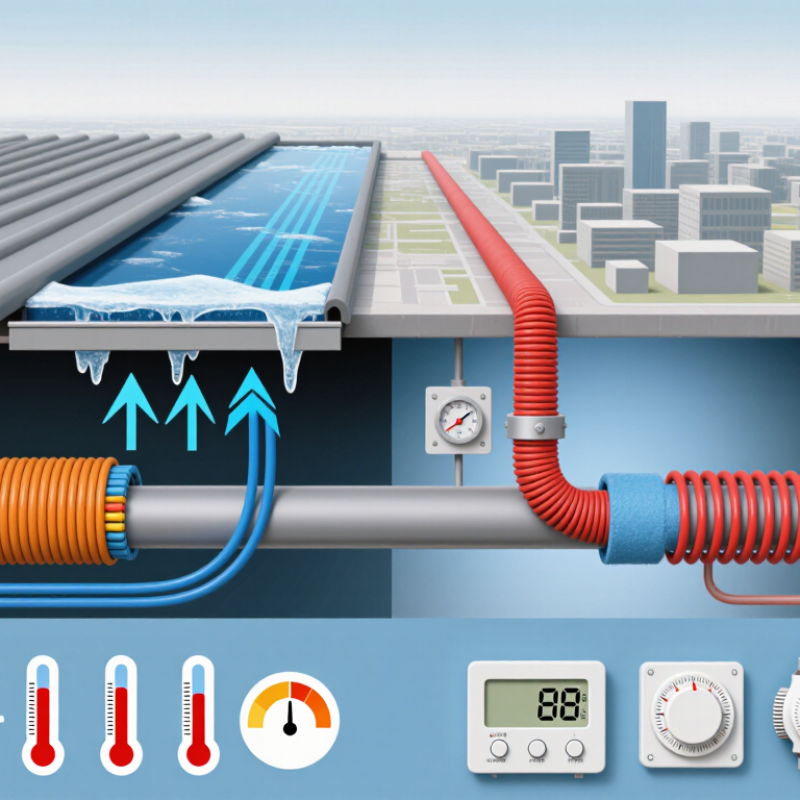
Choosing Heating Cables is not simply a matter of selecting enough watts per metre. The right system depends on where heat is needed, how much insulation surrounds the pipe or floor, and how cold the installation may become. A roof gutter exposed to wind has different demands from a water pipe inside a plant room. Details matter.

The scale of building energy use makes careful specification worthwhile. The 2024 Global Status Report for Buildings and Construction, published by UNEP and the Global Alliance for Buildings and Construction, estimates that buildings consume 32% of global energy and produce 34% of global carbon dioxide emissions. These figures describe buildings broadly, not heating cables alone. Still, they underline why designers should consider heat loss, controls, insulation, and operating schedules together. A cable that is too weak may fail to protect a pipe during a cold snap; one that is poorly controlled may waste energy through unnecessary operation.

This guide compares the practical choices: self-regulating and constant-wattage cables, supply voltage, output, installation environment, and control options. It also explains why temperature limits, cable spacing, and compatible accessories belong in the specification—not as afterthoughts. Small errors linger. Product data sheets and qualified electrical review should guide final selection, especially in demanding or unfamiliar installations. No rule of thumb replaces measured site conditions, and even a careful estimate may need revisiting once the actual pipe, insulation, and exposure are known.
How to Choose the Best Heating Cables for Your Project

Understanding Heating Cables and Their Applications

Heating cables turn electrical power into controlled heat, but their roles differ by project. On exposed water lines, they can limit freezing; beneath floors, they provide radiant comfort; on process pipes, they maintain temperature. Fit matters. The EIA’s 2020 Residential Energy Consumption Survey puts space heating at about 42% of U.S. household site energy use. That figure covers all heating systems, not cable savings, but highlights the value of managing heat loss.

Self-regulating cables reduce local output as pipe temperatures rise, making them useful on variable-temperature runs and freeze-protection work. Constant-wattage cables deliver steadier output and suit defined, uniform heating zones. For higher temperatures or demanding industrial conditions, mineral-insulated designs may be specified. Insulation, pipe material, ambient temperature, circuit length, and controls all affect selection. A cable alone cannot compensate for poorly insulated pipe.

Before specifying a system, map the coldest exposure, required holding temperature, and available power. Check installation conditions and applicable electrical standards with a qualified designer. A practical detail is often missed: valves, supports, and dead legs can lose heat faster than straight pipe. Treating the cable schedule as a guarantee is risky; site conditions can differ from drawings.

How to Choose the Best Heating Cables for Your Project

Typical installed power density varies by application. Use these ranges as a starting point, then size the system for the site’s heat loss, climate, and installation details.

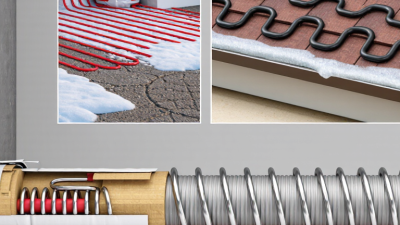
Indoor floor heating commonly uses about 100–150 W/m²; outdoor snow-melting systems commonly use about 250–400 W/m². Actual requirements depend on the project and should be confirmed using the cable manufacturer’s design guidance and applicable electrical codes.

Assessing Your Project’s Heating Requirements

Assessing Your Project’s Heating Requirements

Before selecting a heating cable, define what needs heat and why. A bathroom floor may need gentle comfort heating, while an outdoor pipe needs protection against freezing. Those jobs require different heat outputs and control strategies. Measure the heated area or pipe length, then note its material, insulation, and exposure to drafts, moisture, or cold air.

Small details matter. A pipe beneath a windy deck loses heat faster than one inside a warm utility room.

Estimate heat loss using the project’s lowest expected ambient temperature, not just a typical day. Check the floor covering or pipe material, because each affects how heat transfers. Insulation can reduce the cable output needed, but gaps can create cold spots.

That part is easy to overlook. Compare the calculated requirement with cable output per metre, spacing, circuit limits, and the control device’s capacity.

Follow the installation instructions, and have a qualified electrical professional confirm circuit and safety requirements. A rough estimate can help planning, but it is not a design calculation. Recheck assumptions before buying; actual site conditions often differ from the drawing.

Comparing Heating Cable Types and Materials

Heating cables differ in how they deliver heat. Constant-wattage cables produce a steady output along their length, making them useful for regular layouts with predictable heat loss. They need careful spacing. Overlapping sections can create hot spots, so follow the cable’s installation instructions.

Self-regulating cables adjust their output as nearby temperatures change. Their conductive core expands or contracts with heat, reducing output in warmer areas. This can help on pipes with changing exposure, such as a run partly indoors and partly along a cold exterior wall. They are often easier to adapt, but still require correct circuit protection and suitable controls. Flexible does not mean foolproof.

Materials matter, too. Copper conductors carry current, while polymer insulation protects them from moisture and abrasion. For harsher locations, fluoropolymer jackets or metal sheaths can offer added resistance to chemicals, impact, or high temperatures. Mineral-insulated cables use a metal sheath and compact insulation, which suits demanding heat levels but can be less forgiving to bend. Check the surface temperature, wet-location rating, and minimum bend radius against the actual site. A cable that fits the drawing may not fit the pipe once valves and tight corners appear. That detail is easy to miss.

Choosing Cable Length, Output, and Control Systems

Start with the area that actually needs heat, not the room’s full floor area. Measure around fixed cabinets, drains, pipe bends, and other obstacles. Then use the cable’s specified spacing and layout instructions to estimate the required length. Small details matter. A cable that is too short may leave cold patches; excess cable must not be tightly bundled or overlapped unless its instructions explicitly allow it. A drawing can look tidy and still need changes after site measurements.

Check the cable’s output per metre and total wattage against the project’s heat-loss needs, insulation, and surface limits. A well-insulated floor may need less output than a cold, exposed pipe run. Higher output is not automatically better. It can increase energy use or risk overheating sensitive surfaces. Follow the cable’s technical data, and have an electrician verify supply capacity and installation conditions. One assumption worth revisiting: room size alone rarely tells you enough.

Choose controls that suit the application. For a heated floor, a compatible thermostat with a floor sensor can help maintain a set surface temperature; pipe-trace systems may need a thermostat or sensor suited to pipe conditions. Confirm sensor placement and control compatibility before installation. Test the layout and sensor readings before covering the cable. It is much harder to correct later.

Checking Installation Conditions and Safety Standards

Before selecting a heating cable, map the conditions it will face. Is it under tile, on a pipe, or exposed to weather? Note the substrate, moisture, temperature range, and available electrical supply. A cable suitable for a dry floor may not be rated for a damp roof edge. Check the manufacturer’s installation limits and applicable electrical codes, then match them to the actual site. Small details matter: a sharp bend near a drain or a sensor placed away from the heated area can undermine performance.

Safety checks should follow the system’s intended use. IEEE 515-2017 covers testing, design, installation, and maintenance of industrial electrical trace heating; other applications may require different standards and local approvals. Before covering a cable, document its resistance and insulation readings, and repeat the tests after installation. NFPA’s Home Fires Involving Heating Equipment report found heating equipment involved in 14% of reported U.S. home fires during 2016–2020. That figure covers many kinds of heating equipment, not heating cables alone, but it reinforces the need for careful installation. Check circuit protection, grounding, and moisture ratings. Keep records. It is easy to rush this part, and that is exactly when a missed reading can become an expensive lesson.

How to Choose the Best Heating Cables for Your Project - Checking Installation Conditions and Safety Standards

Project or Installation Condition Suitable Cable Type Key Selection Factors Installation Checks Safety and Standards Considerations
Freeze protection for water pipes Self-regulating cable or a pipe-freeze-protection cable specifically rated for the application Pipe material and diameter, minimum design temperature, insulation thickness, exposed pipe length, and cable output at the expected conditions Follow the cable instructions for straight tracing or spiraling; keep the cable in close contact with the pipe where required; install compatible insulation and weather protection Use a product approved for the location and pipe application. Provide grounding and required ground-fault protection; confirm the supply voltage and circuit protection match the product instructions and local electrical code
Roof and gutter ice-melt systems Outdoor-rated roof-and-gutter heating cable or a system designed specifically for the roof assembly Roof material, roof geometry, gutter and downspout layout, drainage path, local winter conditions, and required cable spacing Check that the cable is permitted on the roof material; secure it with compatible attachment methods; ensure meltwater can drain freely and avoid sharp edges or mechanical damage Choose equipment rated for wet, outdoor exposure and the expected temperatures. Follow the listed layout and attachment instructions; use required ground-fault protection and suitable outdoor electrical fittings
Underfloor heating beneath tile or stone Floor-heating cable or heating mat approved for the floor construction and finish Heated floor area, room heat loss, floor build-up, substrate, floor-covering limits, and whether a separate thermostat or floor sensor is required Plan cable spacing before installation; do not cut or shorten the heating element unless the instructions expressly allow it; avoid placing cable beneath fixed cabinets or fixtures where prohibited Use a system suitable for the intended floor assembly. Electrical connection, bonding, protective devices, and installation inspection must meet applicable local requirements; follow the product instructions for testing before, during, and after installation
Maintaining process temperature on industrial piping Self-regulating, constant-wattage, or series-resistance heat-tracing cable selected through a heat-loss calculation Required maintain temperature, pipe heat loss, ambient range, pipe material, circuit length, startup current, and any hazardous-area classification Verify cable output at the actual operating temperature; check maximum circuit length, termination method, control strategy, insulation type, and installation clearances For hazardous locations, use a complete trace-heating system certified for the applicable zone or class and temperature rating. Apply the relevant national or regional electrical and hazardous-location requirements
Outdoor steps, ramps, or walkways Outdoor-rated snow-melting cable or mat designed for the specific paved surface Surface material, heated area, snow and ice design conditions, drainage, available electrical capacity, and intended control method Install at the specified depth and spacing; protect the cable during paving; keep it clear of expansion joints unless the design provides an approved crossing detail Confirm suitability for wet outdoor locations and the paving materials. Use appropriate ground-fault protection, grounding, and weather-rated connections in accordance with the installation instructions and local code
Installation in a wet, corrosive, or mechanically exposed area A cable and accessory system specifically rated for the exposure and installation environment Moisture, chemicals, UV exposure, abrasion, impact risk, maximum temperature, and compatibility with pipe, roof, or floor materials Inspect the route for sharp edges and pinch points; use compatible seals and supports; protect vulnerable sections from traffic, tools, and maintenance work Check the complete system rating, including cable, splice kits, end seals, junction boxes, and controls. Do not assume that one component’s rating applies to the entire installation
Any project with long runs or multiple heating circuits Cable type selected for the required circuit length, electrical load, and control method Supply voltage, total wattage, circuit-breaker capacity, cable cold-start current where applicable, voltage drop, and the number of independent circuits Use the manufacturer’s design tables to confirm maximum circuit length and connection requirements; label circuits and record test results for commissioning Have circuit design and electrical connections checked by a qualified professional where required. Apply the locally adopted electrical code and all product listing and installation requirements

Important: Heating-cable requirements vary by application and jurisdiction. Confirm the current local electrical code, product certification, installation manual, and any project-specific requirements before selecting or installing a system.